Yay, my first DIY tutorial! Here goes ...
Yesterday I wore a Free People cardigan to lunch that I have literally had since I was 15. The reason I've hung onto it for so long, besides the fact that it's this cool light seafoam green color, is the pretty beading along the shoulder and up the abdomen.

I thought I could probably replicate the embroidery and beading, and so today I did. I'm a cardigan junkie and I especially love vintage beaded cardigans. Plus I had two plain black cardigans in my closet and didn't mind sacrificing one to a craft disaster. Fortunately, I really dig the way mine turned out; here's how I did it:
What You Need:
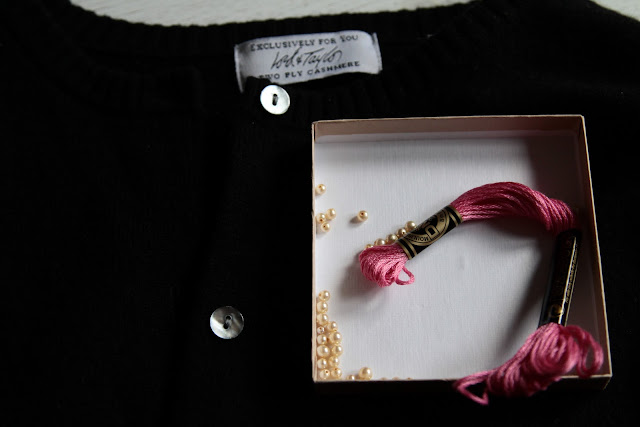
- A plain cardigan
- A skein of embroidery thread and a needle
- A handful of seed beads
- Tailor's chalk or fabric marker
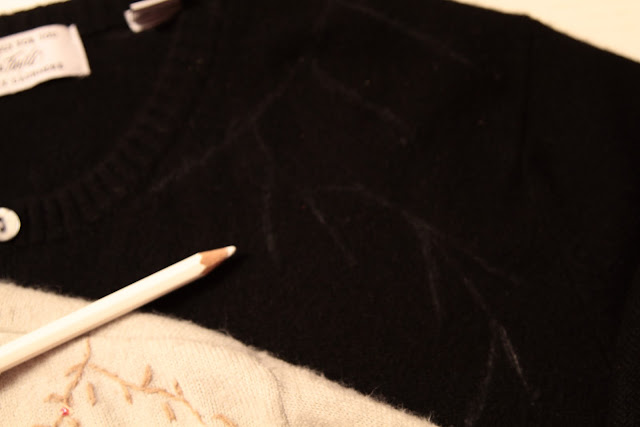
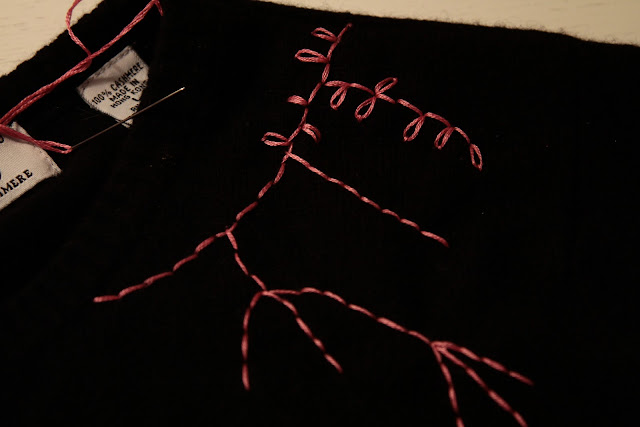
1) Draw your pattern onto the cardigan. I used tailor's chalk and used freehand to copy the basic pattern of the embroidery on my Free People cardigan. You can barely see the marks in the photo below because they were very light and not meant to be really precise. It just gave me a basic outline to follow.
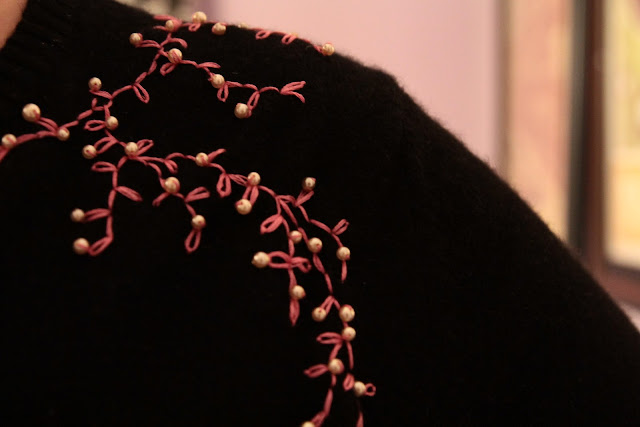
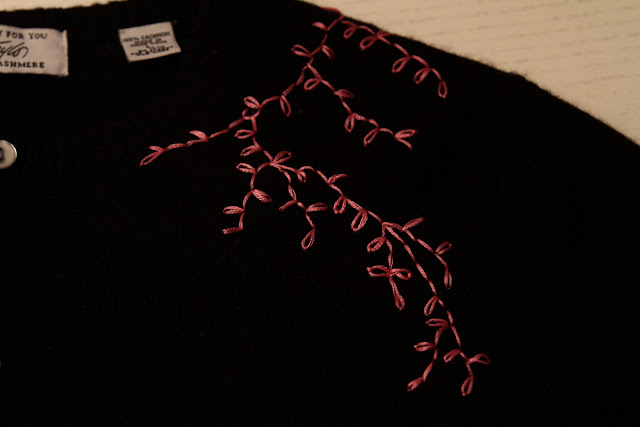
2) Use four threads of your embroidery floss to back stitch the "stem" part of the pattern. It's OK if the stitches are a little uneven because you can fill in the gaps with the leaves and beading later on.
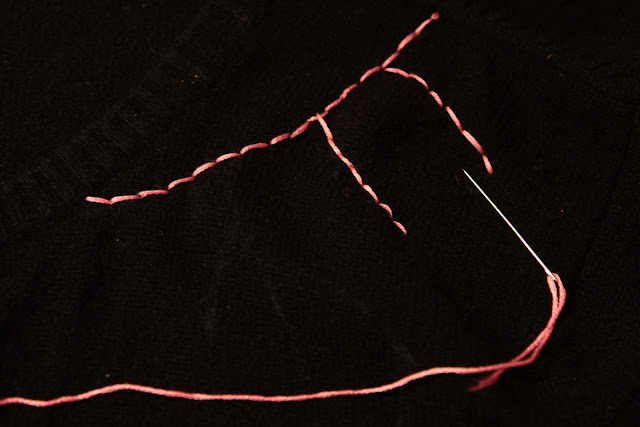

3) Use a chain stitch to add "leaves" at random. You can use these leaves to mask any imperfections or gaps in the back stitching you used to create the stems.
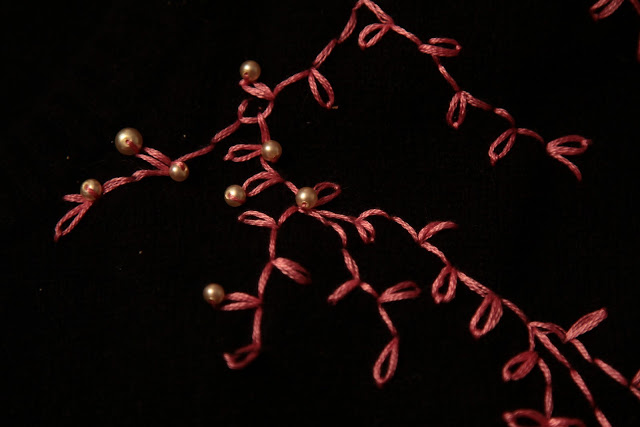
4) Add beads. I had to swap my needle for a smaller one that would fit through the bead. I used small pearls but any seed bead would work. I used just two threads of embroidery floss and placed the beads all along the vine at random.
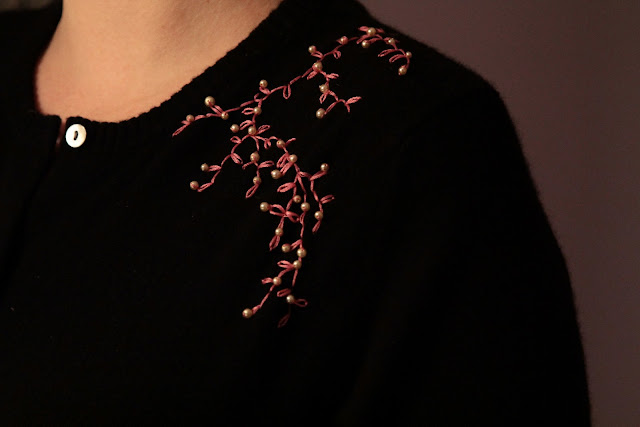
5) Rock the sweater with just the shoulder embroidery or add more along the other shoulder or up the opposite side. Enjoy!

Yesterday I wore a Free People cardigan to lunch that I have literally had since I was 15. The reason I've hung onto it for so long, besides the fact that it's this cool light seafoam green color, is the pretty beading along the shoulder and up the abdomen.
I thought I could probably replicate the embroidery and beading, and so today I did. I'm a cardigan junkie and I especially love vintage beaded cardigans. Plus I had two plain black cardigans in my closet and didn't mind sacrificing one to a craft disaster. Fortunately, I really dig the way mine turned out; here's how I did it:
What You Need:
- A plain cardigan
- A skein of embroidery thread and a needle
- A handful of seed beads
- Tailor's chalk or fabric marker
1) Draw your pattern onto the cardigan. I used tailor's chalk and used freehand to copy the basic pattern of the embroidery on my Free People cardigan. You can barely see the marks in the photo below because they were very light and not meant to be really precise. It just gave me a basic outline to follow.
2) Use four threads of your embroidery floss to back stitch the "stem" part of the pattern. It's OK if the stitches are a little uneven because you can fill in the gaps with the leaves and beading later on.
3) Use a chain stitch to add "leaves" at random. You can use these leaves to mask any imperfections or gaps in the back stitching you used to create the stems.
4) Add beads. I had to swap my needle for a smaller one that would fit through the bead. I used small pearls but any seed bead would work. I used just two threads of embroidery floss and placed the beads all along the vine at random.
5) Rock the sweater with just the shoulder embroidery or add more along the other shoulder or up the opposite side. Enjoy!
love this! will definitely have to update one of my many cardigans ... as i am a junkie for them too!
ReplyDeleteI ***LOVE*** this! Super cute!
ReplyDeleteoh what a exquisite transformation , truly lovely!
ReplyDeleteThank you for the tutorial.
Best,
Elise